I had a reader ask for slightly more details than a couple of pictures so...
My neighbor Tim came over with his tractor and dumped in about 50 tractor buckets of scoria so I wouldn't have to spend my winter wheelbarrowing it in. After shoveling, raking level (not perfect but pretty level; there's still a couple more floor layers to go where I can make everything exact) and tamping it comes out to a bit over 6 inches. I maybe would have done just under 6 inches but there was a lot of scoria and I didn't feel like bucketing out more than I had to (I did take out a few wheelbarrows even so).
WHAT ARE EARTHBAGS AND WHY AM I BUILDING WITH THEM?
Building with earthbags is essentially building with adobe bricks without going through the lengthy process of making them. You take polypropylene sandbags, fill them with a moist mix of sand and clay, tamp them down hard and connect the layers with 4 point barbed wire. Then, you cover them over with an earthen plaster.
In reality, I didn't use polypropylene bags. Some Brasilians started a type of construction they call hyperadobe which uses mesh bags, or continuous tubing, made from the same material as the onion or potato bags in the grocery store. They don't require barbed wire, though otherwise the process is just about the same.
As I talk about in the blog posts, my design has been guided by simplicity and efficiency. More than anything, what's been most important to me is to live in a house that I myself, with no building experience whatsoever, can design, build and maintain. A natural extension of that has been the desire to live in a peaceful space. For me that means a home that's in tune with nature, thus limiting the use of imported materials for construction, in addition to those that will be needed later on, such as for heating. Please enjoy reading, ask me any questions, get inspired, and come help and learn!
Saturday, August 13, 2011
Friday, August 12, 2011
Friday, August 5, 2011
Plaster and Backfilling and Lintels and Strapping
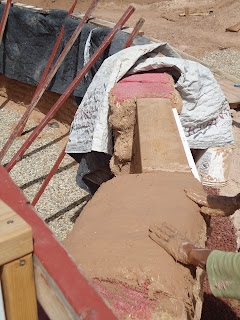
Work progresses! So beautiful to have another human being helping me. We have plastered to varying degrees everything we'd bagged up until yesterday, backfilled the entire perimeter (you can walk up to the walls! No more climbing in and out of a pit!), and set the first lintel. There's just one more bag layer to go on the north side before the last two final tube layers. I'll presumably finish that this weekend while Kevin is gone.
Wednesday, August 3, 2011
Subscribe to:
Comments (Atom)


