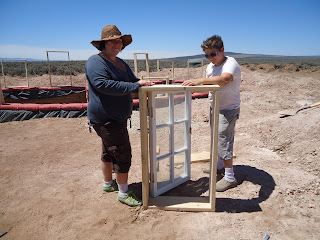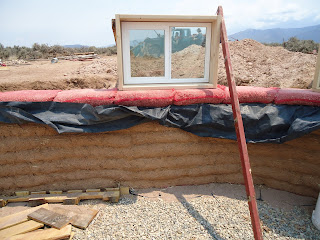


We've been hard at work up here. The window frames have been transported from the storage unit to the work site and all the north frames and windows have been installed and braced. We put two pieces of 2' long 1/2" rebar through each frame and gently nailed in long scrap wood to the ground so they won't budge.
Having the rebar in has an added bonus of feeling a bit more stable. I had already put some in on the south side to counteract the push of the earth against the concave shape of the bags and because there's so many openings, but I thought the bags could use a little more grip to the courses below through the plastic that came up and under. So, there's 2' or more of rebar every 2' or so around the whole bean.
I had a very lucky moment two days ago when I found a craigslist ad for virtually endless scrap lumber throughout this summer and during the next two as well. I was wondering where I was going to get a bunch of scrap for the windows and here it is. There's various dimensions including 16' 1x4's that I'm thinking of sanding and using for my ceiling. The guy who's remodeling a condo complex up in the ski valley is super nice and has all sorts of other random stuff, like treated wood triangles, that I'm going to take and start piling up on the other side of my property. Now I know where those junk piles come from in peoples' yards!
The smoke has been crazy though, oddly, it lessens the pounding sun a bit. Having two more helpers means things go SO much faster and makes me wonder how I would have done some things alone. Scoria was supposed to be delivered on Monday but...a DOT checkpoint or something along those lines means it won't be until next week. Tuesday, inshallah. We'll see. I'm working with it. Don't want to get the walls up too high on that side because I want to have him dump what I need for the floor into the pit to save the hours of shoveling/wheelbarrowing.
Wow, you have gotten a lot done. That's good news on the lumber find. Glad to see your adding rebar.
ReplyDeleteOne word of caution! Protect those windows. Usually the glass portion goes in after the roof. That way falling lumber or accidents don't break the glass. In fact many builders wait until just before the outside finish is going on before installing them.
Also you should add some 1x4 temporary diagonal braces across the window frames to keep them square. The heat and movement of building the walls around them will push them around. You don't want to get the wall built around the windows and find the windows won't open or close.
Check the windows for level before you get them locked in. Can't tell for sure, but picture 7 looks out of level to me. The best way to set the frames is to make the sill level and then use a framing sq. to check the inside corners. Another way is to measure the frame diagonally. Opposing corner to corner measurements diagonally should be the same.
Keep up the good work!
All along the south wall I'm putting in the windows last because...they're huge and unruly and most are glass that will be plastered in. I actually found some info on windows and window frames online of people putting the windows in the frames before they installed them and it seemed best. Having done it so far it seems like it would be very difficult to put the windows in otherwise.
ReplyDeleteAlso, I left 1/4 inch or so between the windows and the frames so they won't get too tight with the heat etc. The front and back bracing seems to be working (actually it's off now because they've been screwed in). I also pounded 1/2 rebar in through the sills and that seems to keep them pretty steady.
Unless my level lies they are!
Thanks!